Had an offline discussion with Kibi when he was repairing his Tek 2445 (
Here) that he had to lift the huge A1 board, the mounts & connections which is identical to 2465/B, and he shared few photos that I think will be useful if anyone plan to detach the A1 board, and I think this photo tips is valueable and never seen elsewhere even at the Yahoo Tek maillist.
Thanks and credit to Kibi for allowing me to share this photos here.

Quoting his tips & photos on detaching the A1 board :
1. Must unsolder the wires that go to the X and Y plates.

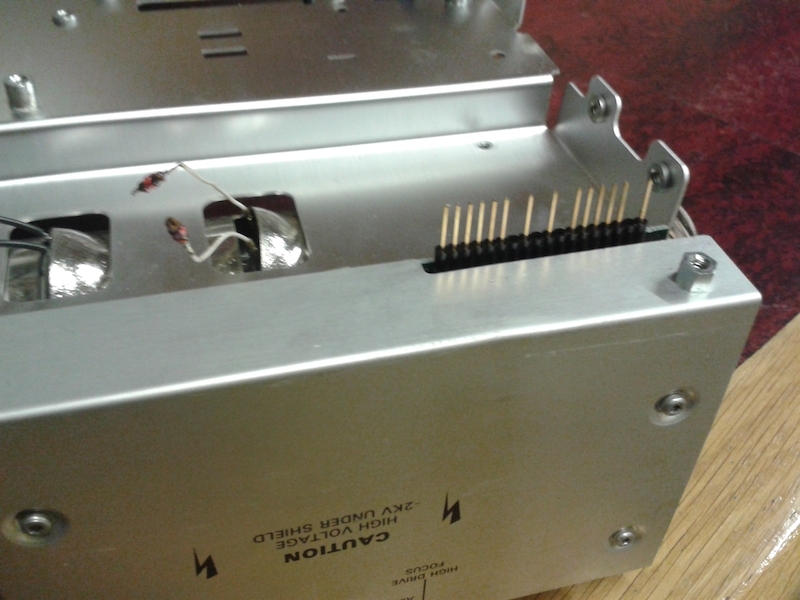
2. Now, I did not remove this PCB (HV) because it looked quite difficult to remove. The A1 PCB is easy to remove without taking this board out, but it's a bit more difficult to put the A1 back in because the pins don't line up nicely because of the A1 being at an angle when you put it back.
3. Don't forget where these coax cables go and their orientation, (take some pictures).

4. After removing the plastic front bezel, you must remove the strip of aluminium here to allow the front end BNC's to come out clear.


