The inside of the green case shows, if you look carefully and know what you are looking for, a 1" gap between the inner frame (and electronics) and the green outer case. (It would be easy to see in a stereoscopic photo, but very few people have suitable red/blue anaglyph viewers to hand!). That gap prevents "unauthorised repair by kicking" or, more charitably, reduces damage when run over by a car. Under the perforated metal grille there are paper bags of dessicant, and there is a humidity indicator visible.
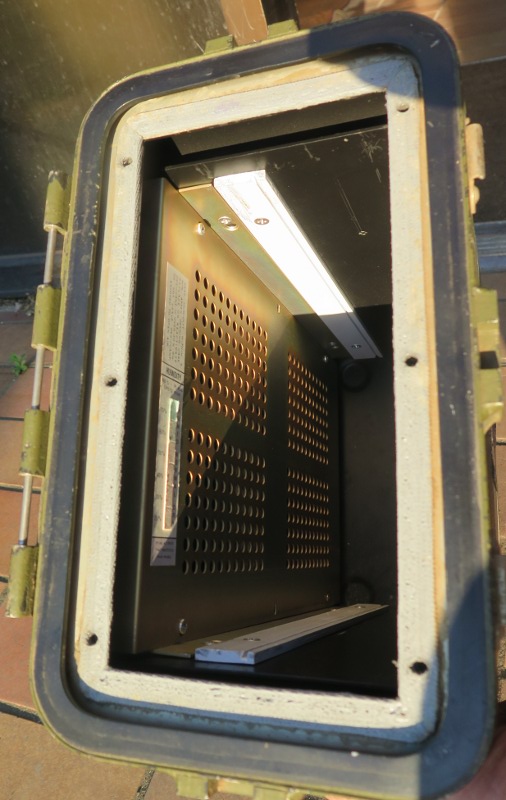
Removing the metal box on the top of the guts shows us the battery compartment is clean; maybe the 21.6V 1.2Ah battery will work and I won't have to replace the 18 cells.

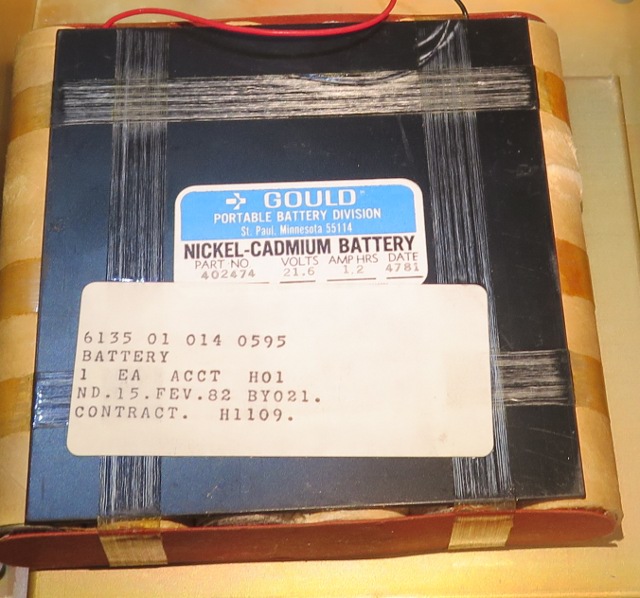
But then since the battery is from 1981 and last charged in 1982 (yes there is a printed record!), maybe not

Anyway, now we can see the interior in all its glory. Shiny.

But when we look more closely, it looks like someone has been bodging. Odd heatshrink, jumper leads clipped and with solder blobs. That would be a real pain, since there isn't a manual let alone a schematic.

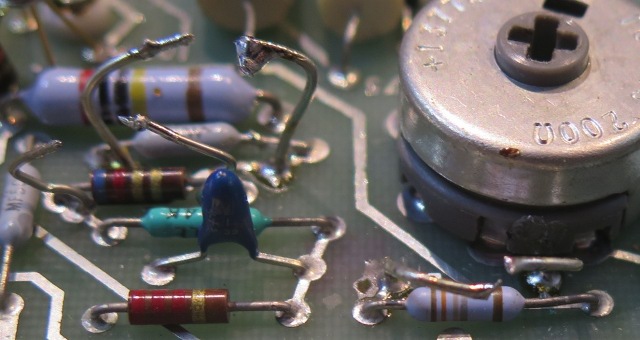
But then maybe not, since the bodged jumpers are inserted into dedicated PCB holes and there are other intact jumpers.

Looking around at more of the guts, there are the usual blue Philips electrolytics and some wet slug tants. None of them show any leakage. I also find a large 250mA fuse that has blown. I don't have one in my stock cupboard, but there is an intact fuse clipped into the cover.
There's no manual for the 8125A, so for the next steps I have to use the manual for the 8120A, which appears to be a bench DMM rather than a muddy field DMM. Fortunately it is pretty similar in most (but not all) respects.
It turns out that the bodged jumper leads are designed in bodges, a variant of select-on-test components. The ones that have been fiddled with are for the DMM zero, for when the DC zero trimpot isn't sufficient!
So, replace the fuse, turn on, apply a 9V input and .... bingo!
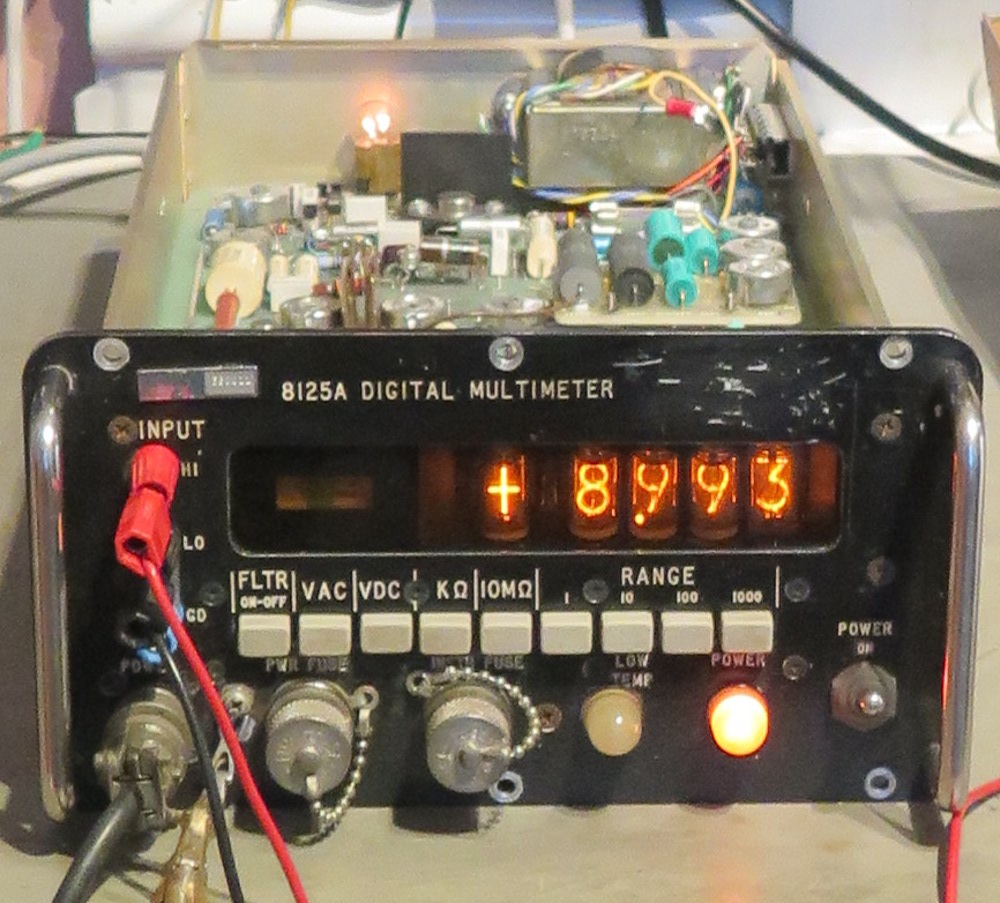
The lighthouse has almost disappeared; the bulb limits currents through the NiCd battery. It looks like that was shorted so I removed it, and the current is back to normal.
I fiddle around with the calibration and find that the jumpers that were cut shouldn't have been cut. Typical.
Trying it with 1/10/100k resistors also gives good measurements, and I can't be bothered to try it with AC volts.
So, while not in wonderful calibration, it is certainly working well enough for me be satisfied that I have nixies, and to call it a day. That also means I can ignore recapping and buying NiCd cells.
Since it is military and my house is
full, at least I can legitimately keep it in the garden shed


