Quick post here after a few queries along the lines of "why do come radio repairs cost so much more and take so much longer than others". With 27 meg SSB radios, the first thing we always ask when we get an email query about the approximate cost / timeframe of a repair is:
Is there a yellow dot sticker on the rear panel of the radio?This throws a lot of people, especially those what weren't living in Adelaide in the late 90's / early 2000's.
For those that were, the go-to man for modifications to increase channels / power / modulation / receive performance / things that make beeping noises was the "Yellow dot man". He would fit extra parts to the radios to achieve those goals, so he must have had some kind of idea what he was doing, but the standard of workmanship was on the "sub prime" side, something along the lines of the EEVblog #822 World's Worst Tablet Computer video on Youtube. Undoing these "improvements" and putting the radio back to factory condition can take months as a spare time job and would be completely uneconomic if I wasn't semi-retired and still charging commercial labor rates. I've never met or spoken to Mr Y.D. but only know his handiwork from ham/cb gear we've had sent in here for repair.
His "signature" was one or two yellow dot stickers attached to the rear panel of the radio.
Received two identical radios today, Hatadi Pearce Simpson Cheetah Mk1 units, mid 80's vintage, made by Uniden, and selling in clean condition for $300+, closer to $400 in unworn condition with the box and original accessories, so worth spending an hour or two on. They usually only need some bad electrolytics replacing and a squirt of deoxit in the controls and they are good for another 20 rears.
These were from a deceased estate and the son wanted them repaired / returned to standard, so with the sentimental value was prepared to pay a bit more than the economic cost. One radio was untouched, probably in case of a visit from an ACMA inspector, and the other had the dreaded yellow dot on the back. Uh-oh....

Rear panel of the "improved" radio

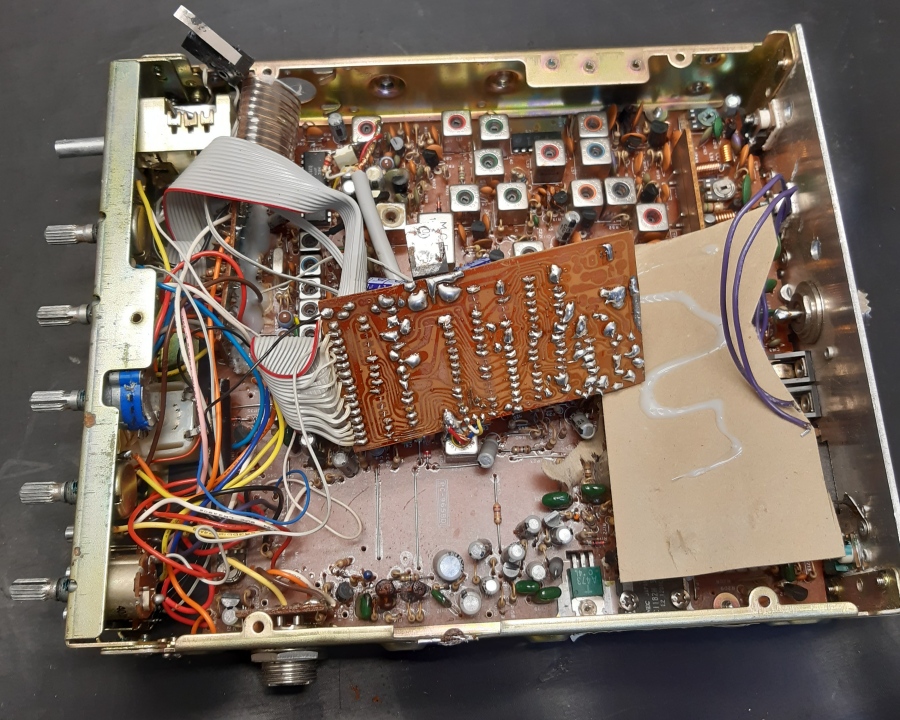
Stuff added to the modified radio. All this added junk has to go. The whole lot was secured with hot snot glue.

Channel switch butchery. Shaft was bent and made to hit two microswitches for up/down. The whole lot was held together with hot snot.

Part of the front panel board (where the original channel selector was) had been cut out to make room for the modified channel selector

The removed half of the front panel board was then hot snotted to the main board a few inches away from where it originally was

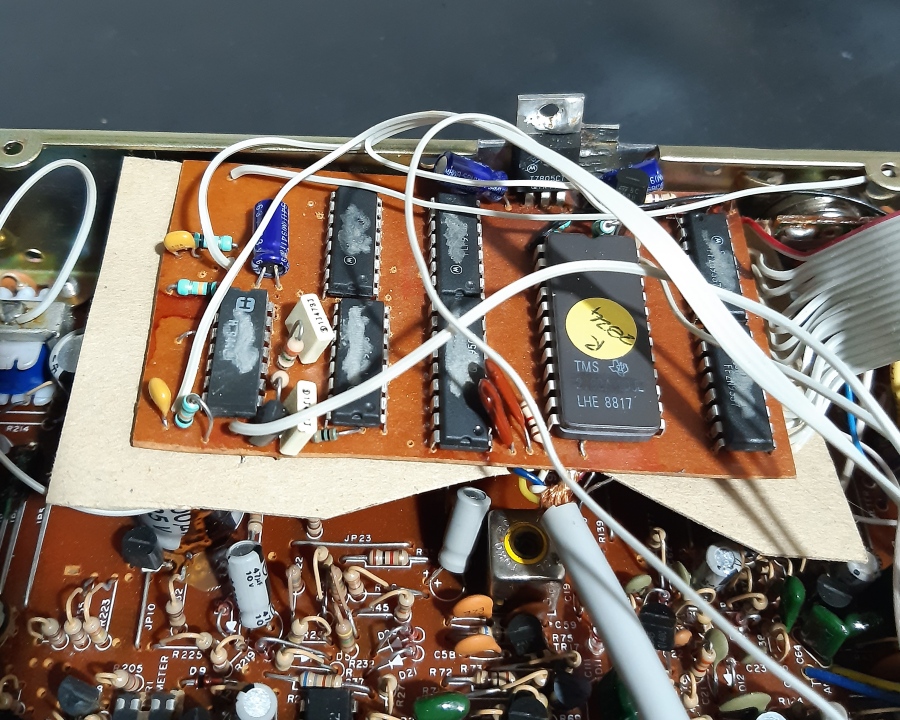
Close up of top of added board. IC part numbers dremelled off so nobody would copy this masterpiece


Close up of bottom of added board. Wired up with old PATA grey ribbon cable separated into individual wires.

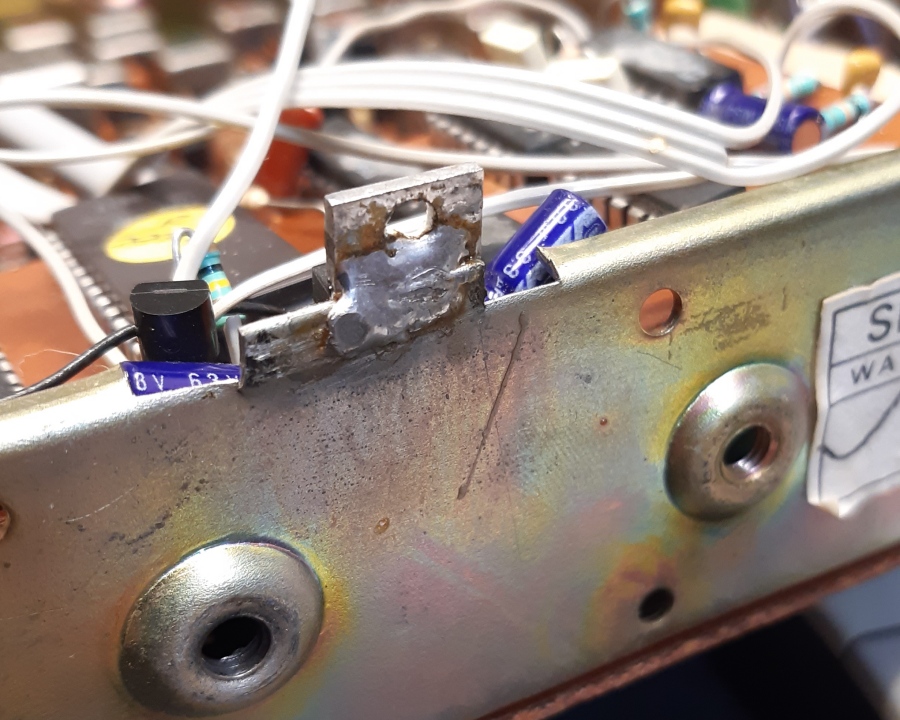
Extra board regulator soldered directly to chassis
The channel display would only light up when the antenna was connected, had me mystified for a while. Then I realised it's a floating chassis so it can be used in positive earth trucks / boats without DC corrosion issues. Our workshop antenna (and the dummy load / load selector switch) is earthed via a lightning arrestor. So the regulator common was connected only via the antenna ground


Added connections to the radios synthesizer / PLL circuitry, probably for "extra" channels

What it should look like - top of the unmodified radio

What it should look like - bottom of the unmodified radio after repair. The old grey electrolytic capacitors were just replaced with new red Wurth components and the radio works like new.
Big difference between these two. First one will be here for a few months as a part time project. The second one was stripped, repaired, cleaned, and aligned in 90 minutes - and on its way back to the owner...
Edit: fixed minor typos...