The alkali that leaks from the battery when it gets too old is really nasty stuff. It is normally potassium hydroxide or sodium hydroxide. It has obviously leaked out further than the first pictures you posted would suggest.
If you don't remove every trace of the leak and neutralise the alkali, then it will continue to damage both the components and the PCB, eating away at the vias, particularly if they are under an IC and the alkali has seeped in between the bottom of the IC and the PCB.
The best way to stop this getting any worse is to thoroughly wash down the PCB over the complete area affected by the leak several times with a dilute solution of spirit vinegar and a brush. Then with multiple washes of distilled water (if you live in a soft water area, tap water is OK) followed by a final couple of washes with pure isopropanol. If you can see places where the alkali may have got in under the ICs, make sure that you can run the cleaning solutions underneath them. Use an air jet to make sure that the cleaning agent gets blown out from under any ICs after each wash. If there are vias under the ICs, you will need to remove the ICs to properly deal with the vias.
From your picture, I can see that the solder in many of the vias has turned grey and dull. This is from the battery leak and it would be wise to test each via to make sure it still works, desolder any grey vias, neutralise any remaining alkali and then fill them with fresh solder. If you don't, you may find them going open circuit as the alkali can get down into them and continue eating away at the through hole plating from the inside. You will also discover that it is really difficult to remove the grey solder as it doesn't want to melt properly any more. I had to resort to a very thin stainless steel needle to completely clear some of them and then install a thin wire through the via and scrape back a little solder resist on each side to solder the wire to the tracks that the via connected.
If the PCB has internal layers, it is often a case of "beyond economic repair" when they get hit by a battery leak as repairing vias that connect to internal layers is very difficult and time consuming.
Leaking batteries are a real menace on test gear of this era. I'm still working on fixing a Solartron 7151 I bought which had been subject to a catastrophic battery leak. I saved some pictures of the horror and what I've had to do so far to repair the damage.
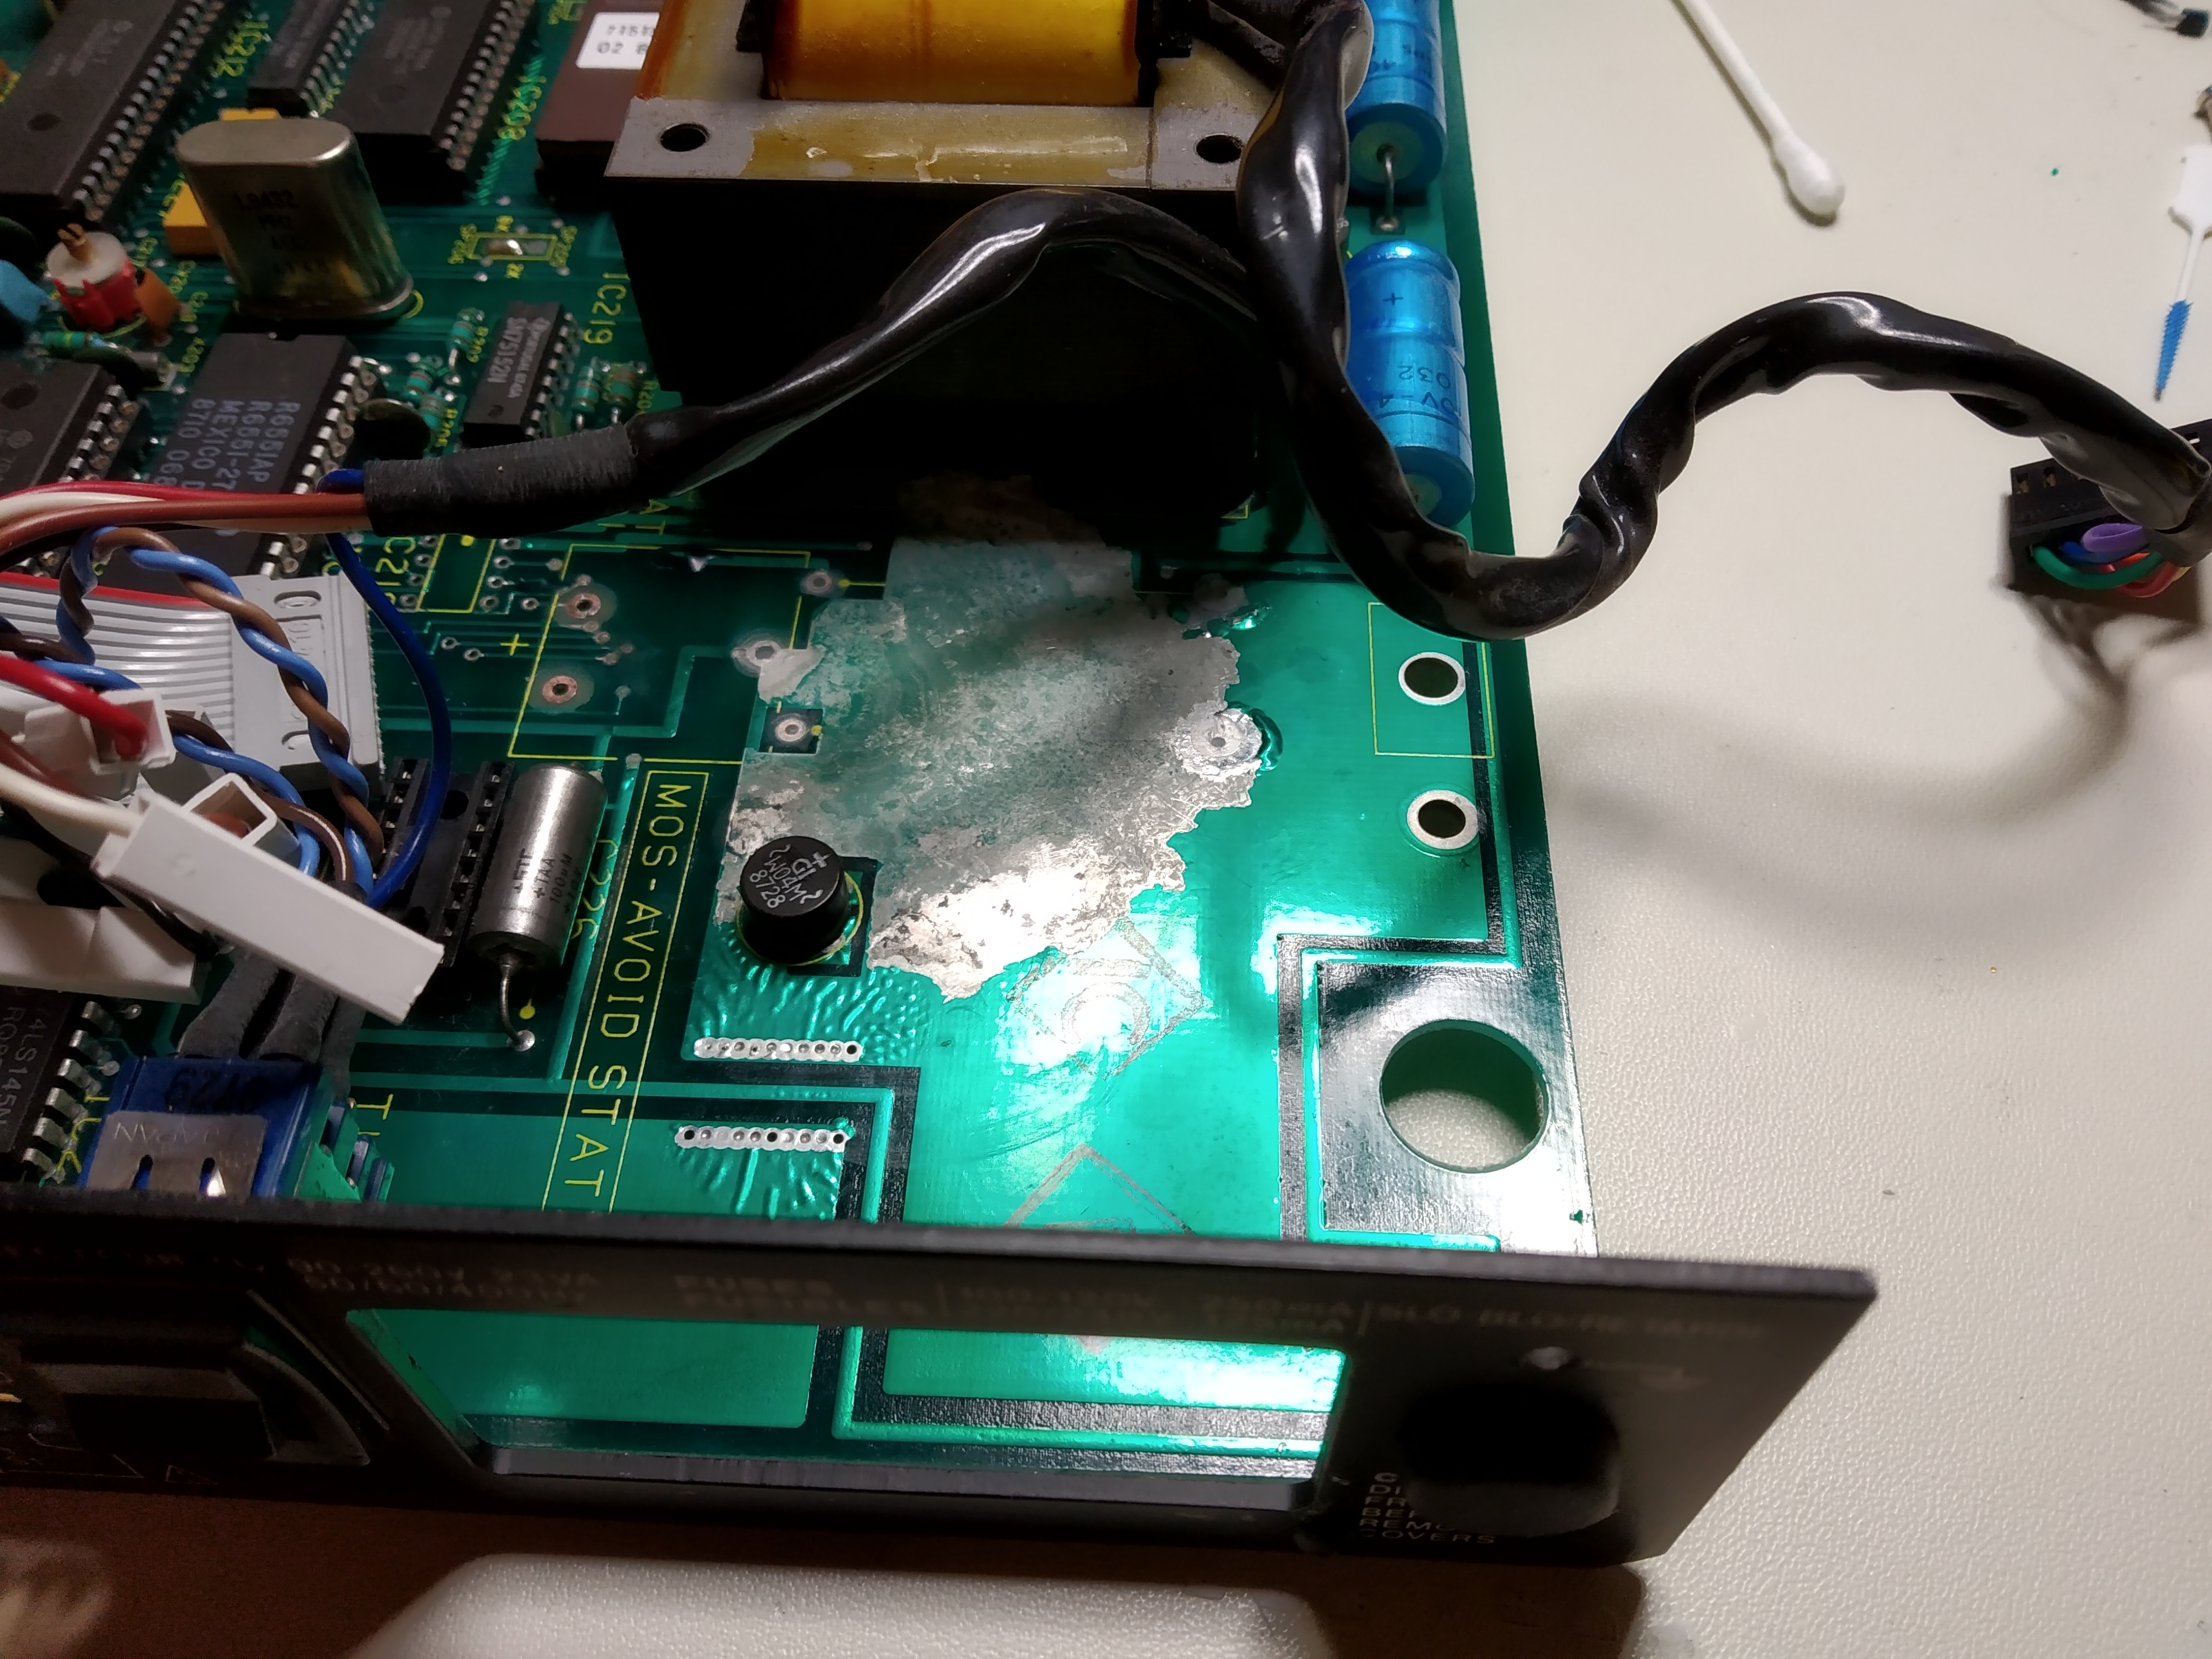
At first, it didn't look too bad once I'd removed the leaking battery:
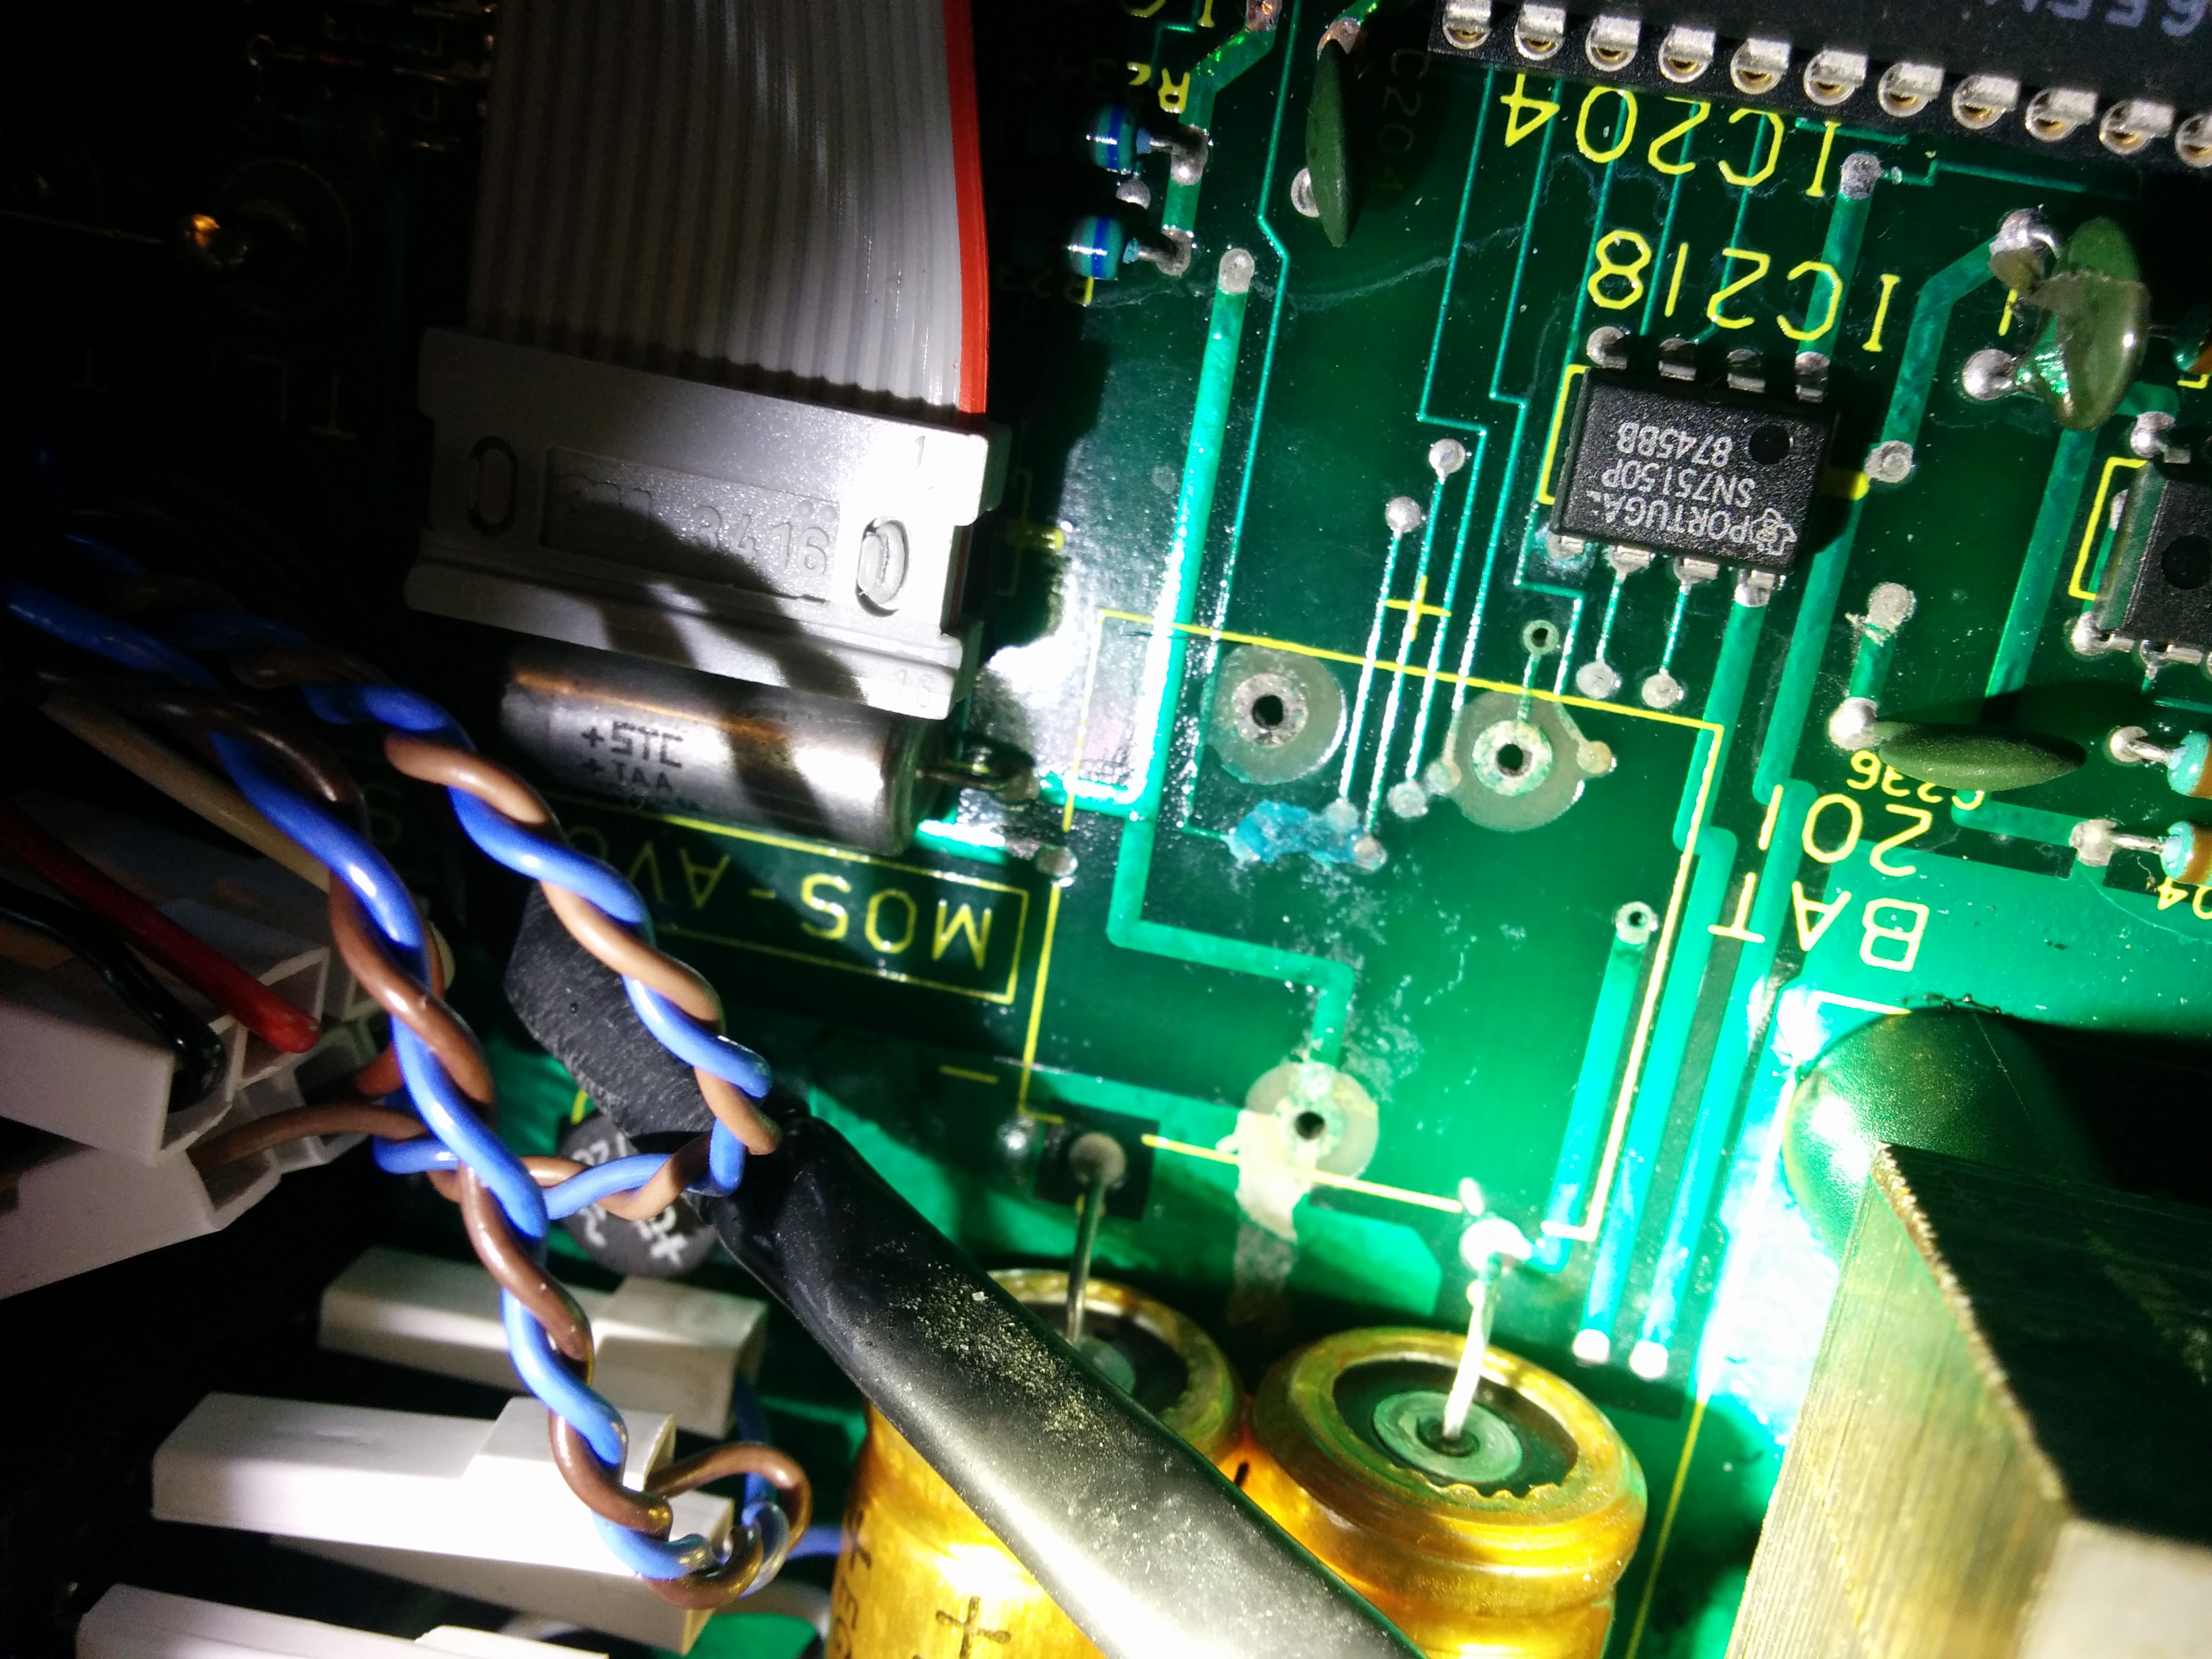
But the more I looked, the worse it got. Just about every via here is open circuit and the 75150 chip in the first picture is dead.
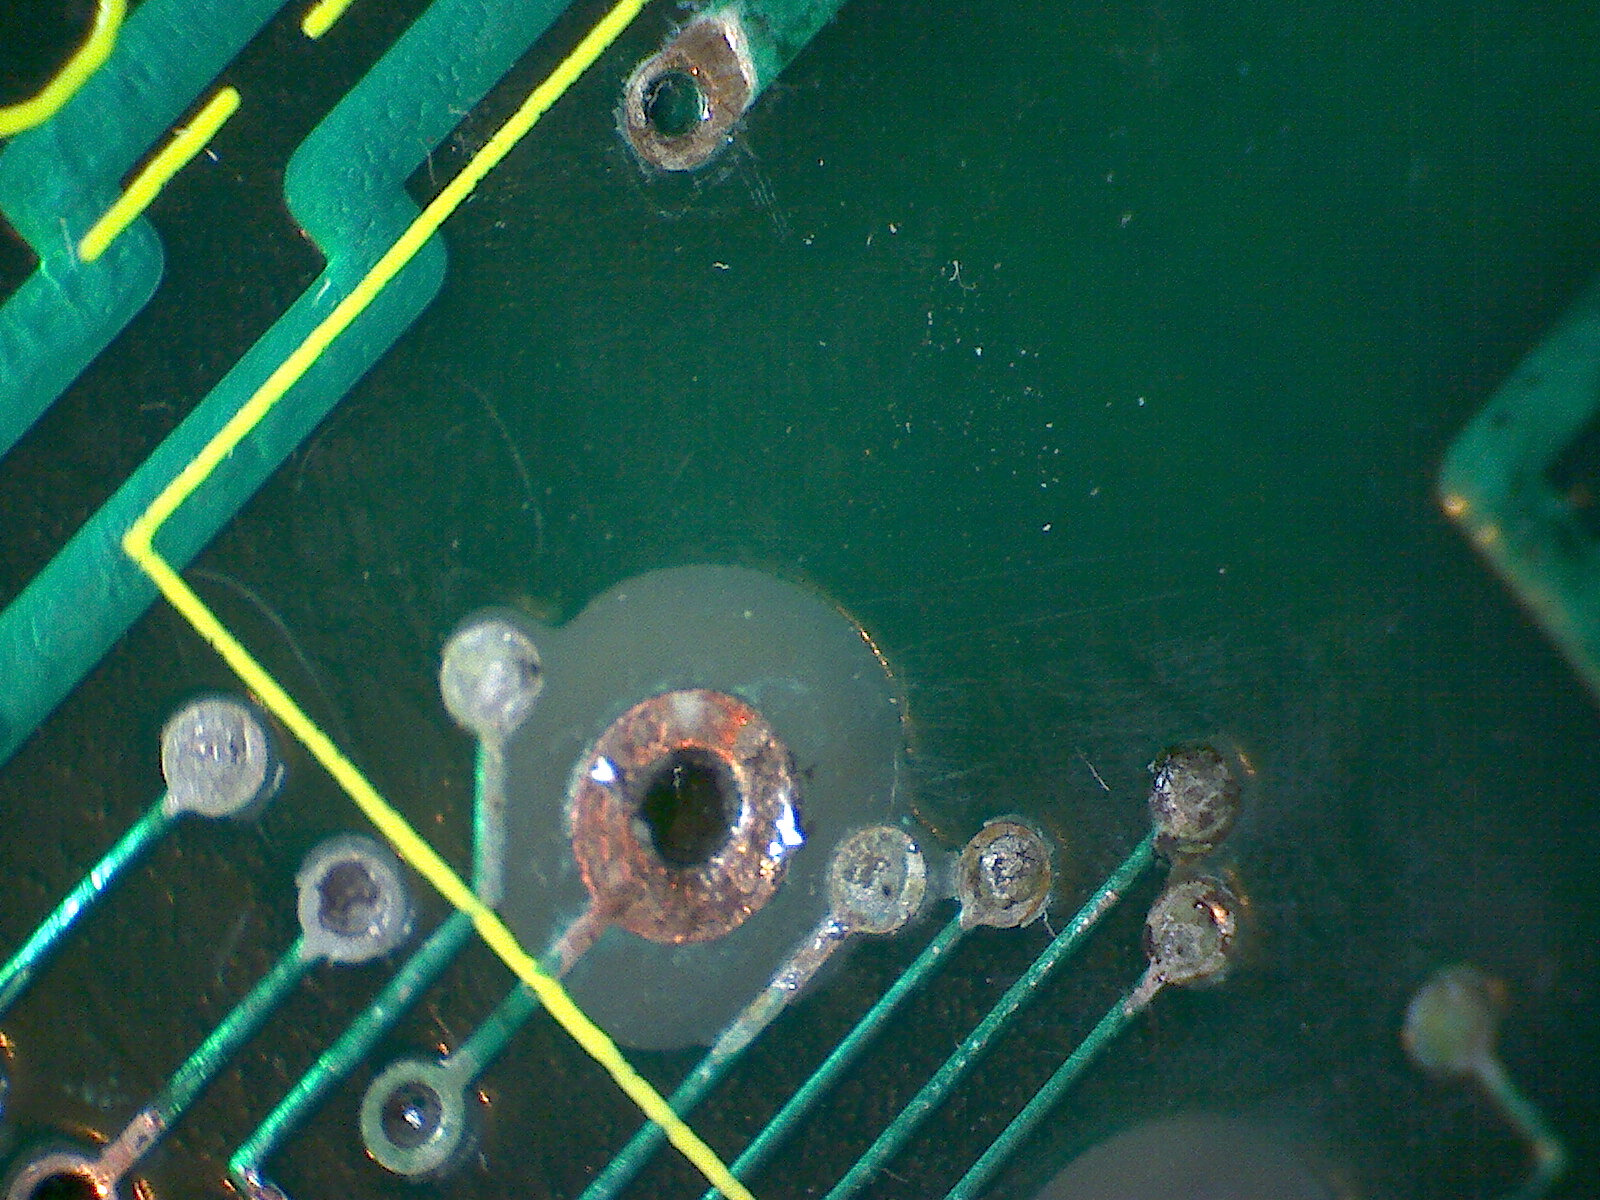
Then I discovered that the alkali can actually wick under the layer of solder resist and spread even further than you think it has. As soon as I poked at the solder resist, it would simply flake off, so I had to start stripping that back until I got to the point where it was no longer flaky, scrape off a little more to be sure and then clean everything again starting with the vinegar solution.
The pictures are all clickable for full resolution.
If you can see that IC310 and 312 are badly corroded, then the best thing to do is remove them, clean again, repair any open vias and install replacements. It's always better to err on the side of caution and limit any further damage as much as you can. I'll keep my fingers crossed that the damage doesn't extend too far!
Hopefully, all this hard work will give you a perfectly working reward.


