
The Intersil ICL8038 is a Precision Waveform Generator: 0,001Hz - 300kHz square wave, triangle and sine wave output with a duty cycle of 2%-98%. Supplied with 30V the chip can generate a signal with 28Vpp.
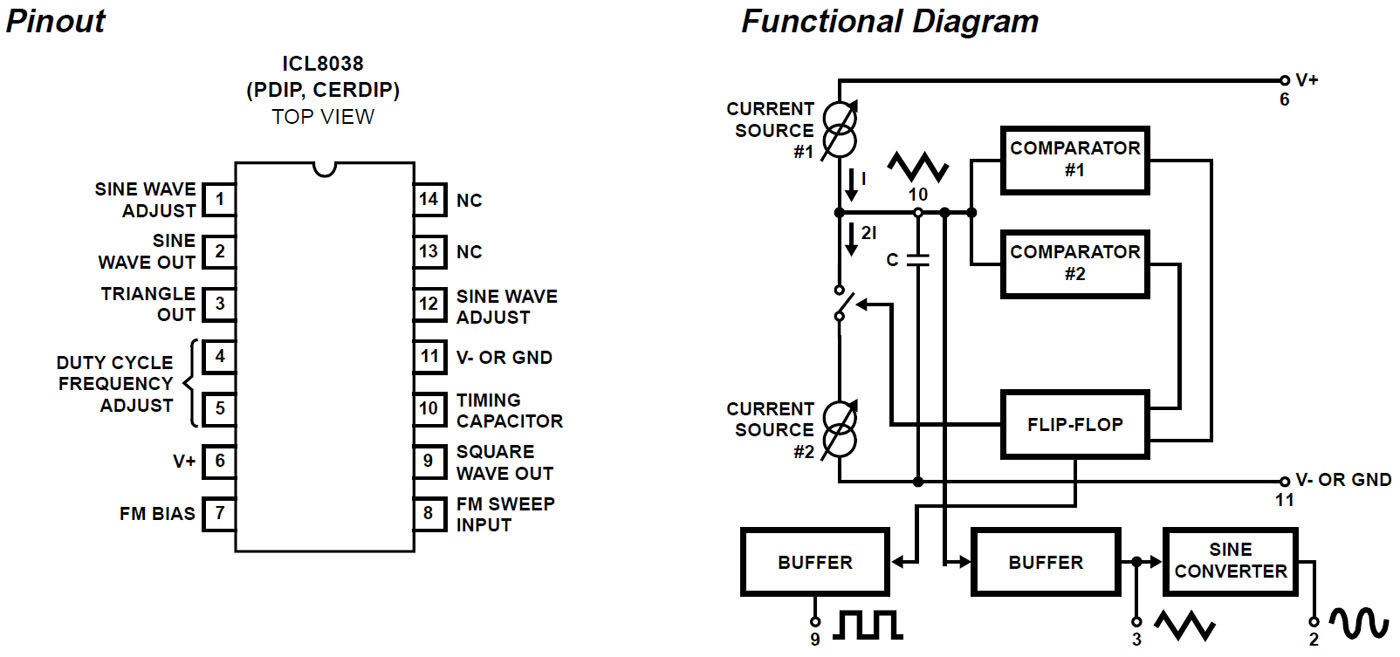
The datasheet contains a block diagram. There are two current sources, one charging, one discharging a external capacitor. Since the discharging part sinks twice the current of the charging source you just have to switch the sink to get +/-I. At the capacitor you get the triangle wave. A sine shaper converts the triangle into a sine wave. Two comparators and a flip-flop are managing the current switching to get the oscillation we want. At a second output of the flip-flop there is the rectangle wave.
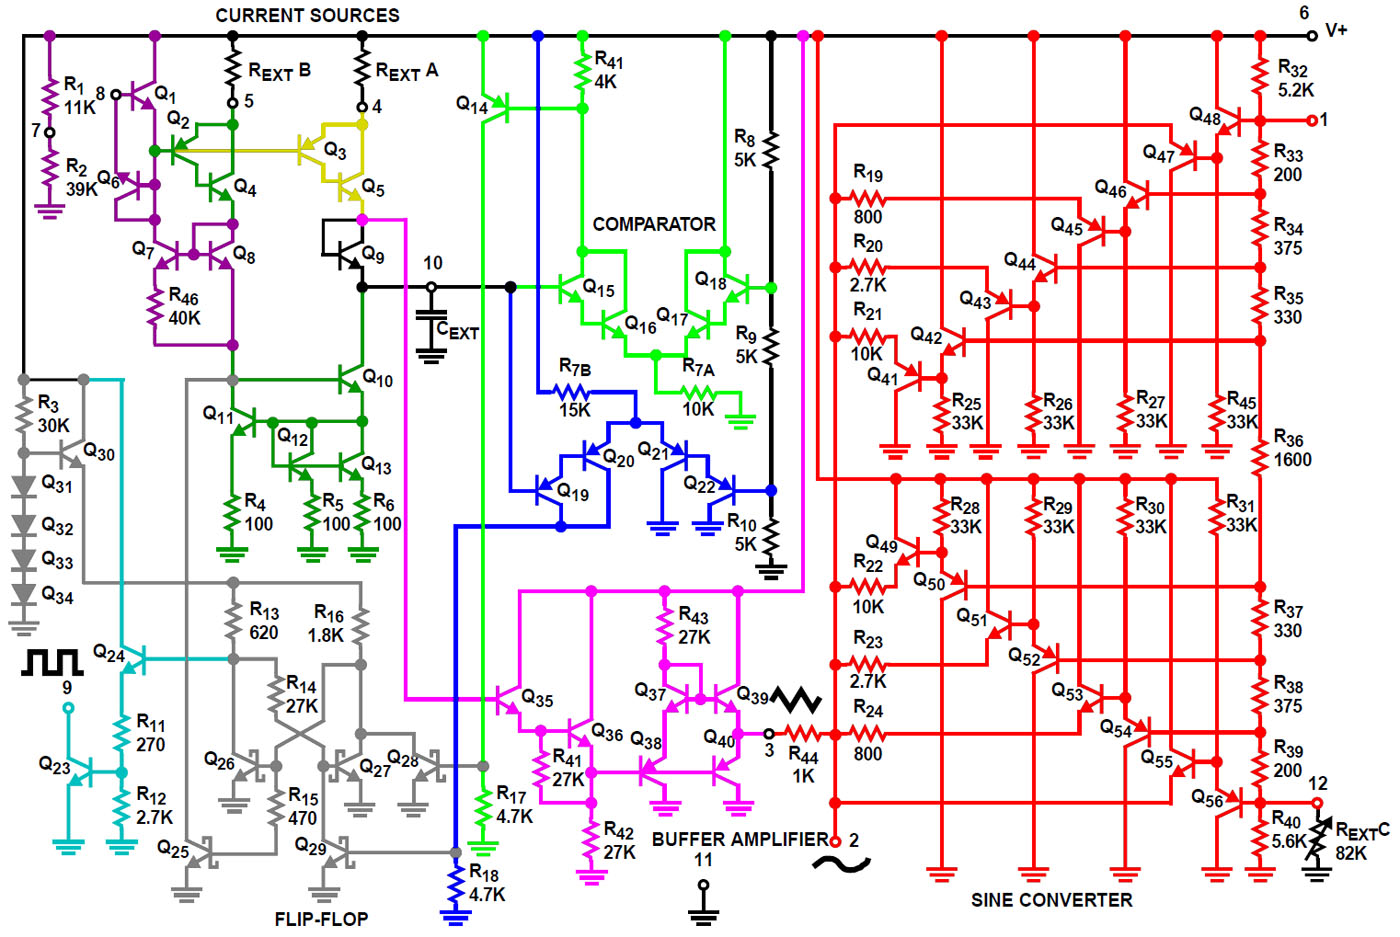
In addition the datasheet contains a schematic (colored by me).
The current source (yellow) is a Sziklai circuit. The current sink (dark green) is based on a current source like the former one. It is transformed into a current sink with a current mirror that also doubles the current. Both current sources are based on the same reference (purple). The currents of the current sources are determined by the external resistors RextA and RextB. With these resistors and the integration capacitor Cext you can set the working frequency. The frequency can be varied through pin 8, which manipulates the reference circuit and so the current sources. Behind pin 7 there is a voltage divider. If you don´t want to adjust the frequency you just have to connect pin 7 and pin 8.
The triangle signal at the integration capacitor is tapped above the transistor Q9 which is connected as a diode. In the buffer amplifier for the triangle signal (pink) there is a Darlington circuit in the first place (Q35/Q36). It is followed by an interesting output stage whose main component is the transistor Q40. The potential at pin 3 is determined by the base-emitter junctions Q9 / Q35 / Q36 / Q40. Thanks to the transistor Q9, the potential at pin 3 is at the same level as the potential of the integration capacitor. Through Q9 / Q35 / Q36 / Q38 / Q37 the base of the transistor Q39 is slightly higher and thus provides some pull-up / bias current. According to the datasheet, the output stage can draw up to 25mA. A diagram shows that the current delivery capability is much more limited. The signal oscillates around half the supply voltage. If one uses a balanced supply, the average value settles at 0V.
To generate a sinusoidal signal. The triangle wave is fed with a relatively high impedance (R44) into a circuit that represents a voltage dependent impedance (red). As the level of the triangular wave increases, the load increases and more voltage drops across R44, reducing the rise of the voltage at pin 2. This results in the desired sinusoidal signal, more precisely an approximation. The voltage dependent impedance is generated with a large symmetrical circuit. The PNP transistors Q41, Q43, Q45 and Q47 become conductive one after the other as the voltage rises and draw different currents depending on their emitter resistances. Behind each transistor a second transistor determines the voltage the stage kicks in. These transistors are connected to a large voltage divider at the right edge. For the low level part of the signal, the same circuit is built in a complementary way in the lower part of the schematic. Here the NPN transistors Q49, Q51, Q53 and Q55 supply a current that increases as the voltage drops. With the help of pin 1 and 12 it is possible to adjust the circuit so that the distortion of the sinusoidal signal gets below 0.5%. Without the adjustment the typical distortion of the worst case ICL8038CC is 2,0%.
The two comparators are connected to the integration capacitor (light green/blue). The resistors R8, R9 and R10 determine the switching points of the comparators. The output signal of the upper comparator is inverted by transistor Q14. The Flip-Flop (grey) is built with Schottky transistors. These transistors have a Schottky diode between base and collector which prevents the transistor from being driven into saturation so it can be switched off faster. The Flip-Flop has its own small voltage regulator (Q30-Q34). The current sink (dark green) is switched off by the output of the flip-flop draining the current in the reference path of the current mirror. The buffer amplifier for the square wave signal provides an open collector output (cyan).
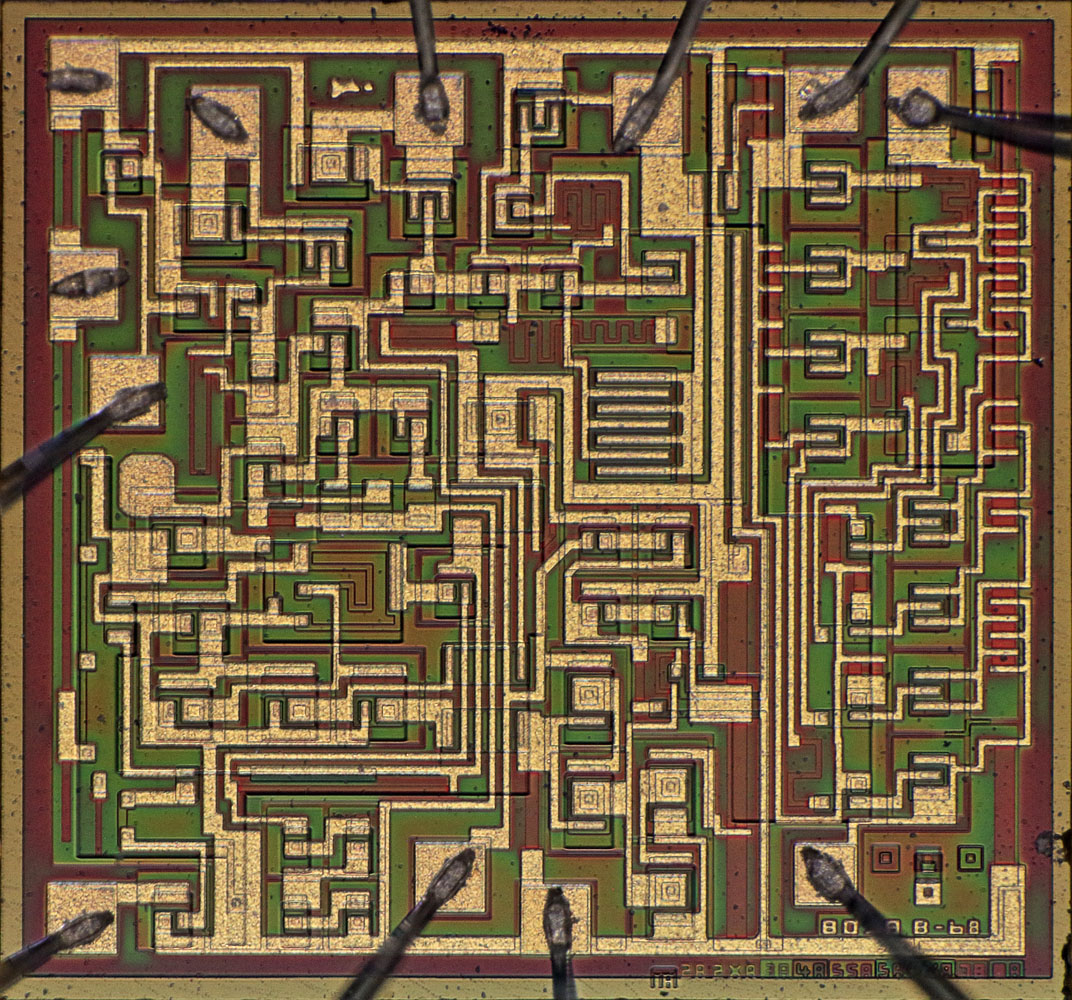
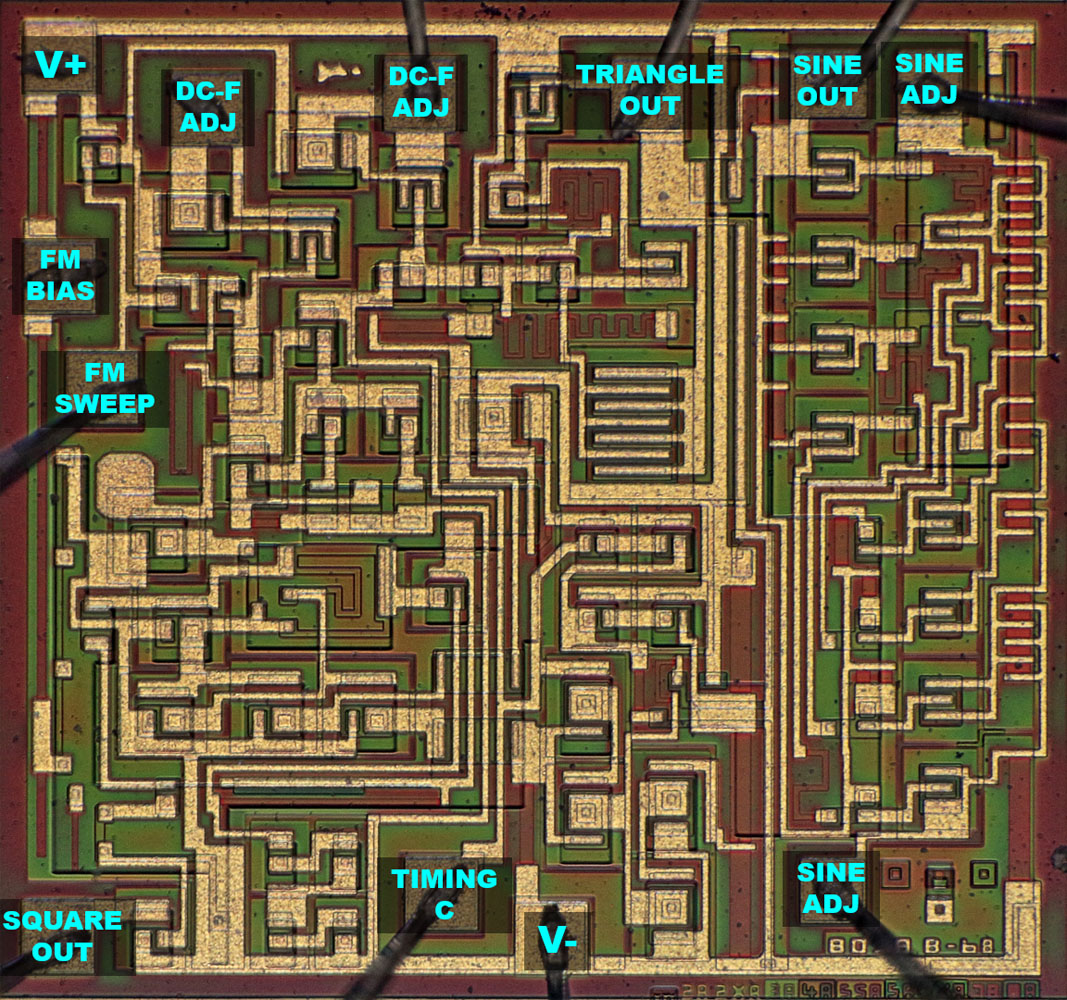
The die is 1,9mm x 1,8mm.
Intersil

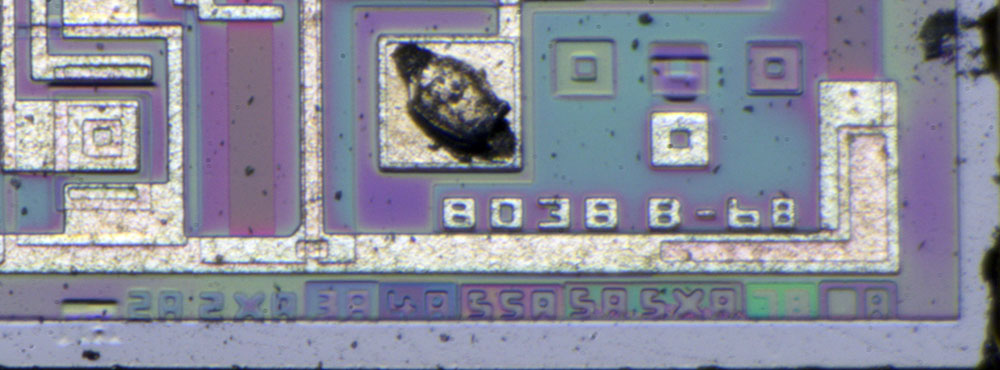
In the lower right corner we have the mask revisions. The revision of the metal layer (6B) is moved to the part name. The B at the end of the name is probably the revision of the whole design.
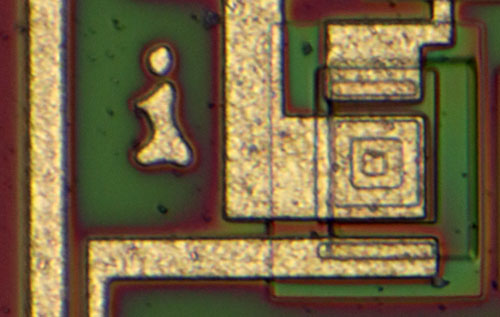
This "mi" thing on the left could be a signature...


On the left edge of the die we have the voltage divider for the current source reference.
The upper part (red) should have 11k while the lower part (green/cyan) should have 39k. It looks like the lower part can be tuned.

The cyan part probably contributes a lower resistance which can be connected by some vias. The lower contact of the green resistor looks like it can be moved.
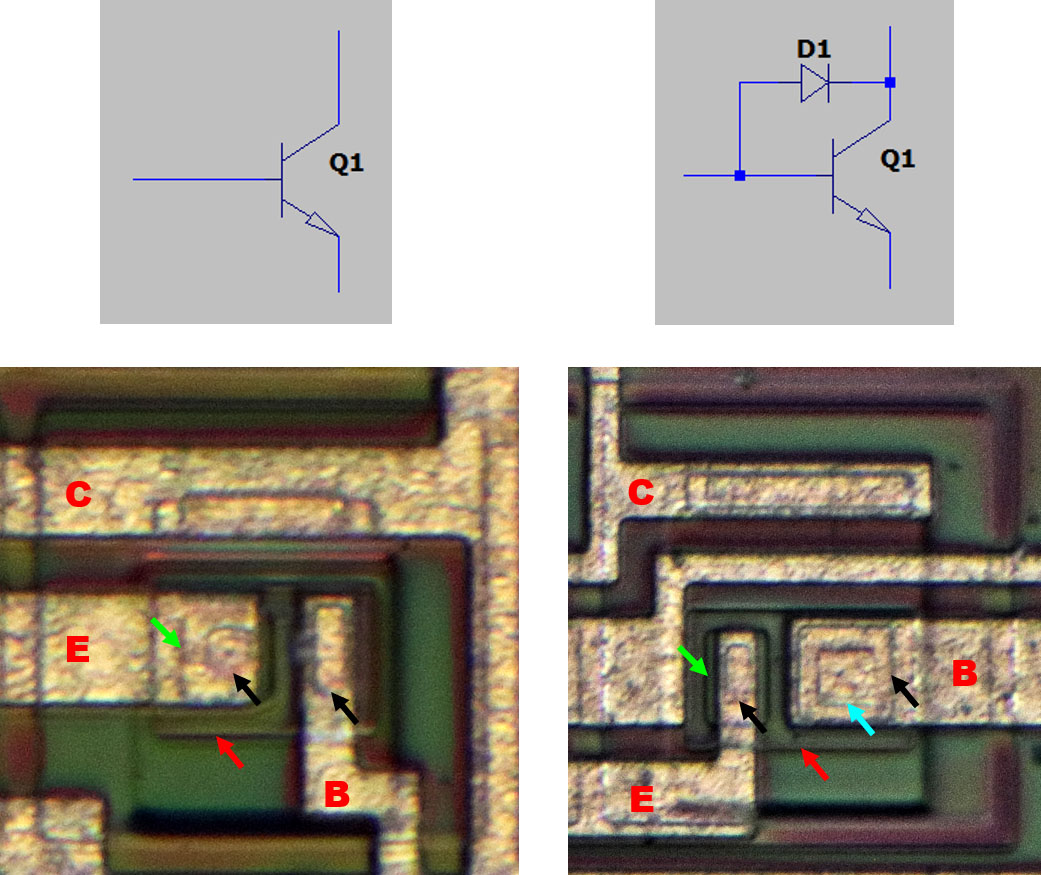
Here you can see the difference between a normal transistor (left) and a Schottky transistor (right). In both transistors you can see the edges of the base (red) and the emitter (green) areas. You can recognize the contact areas too (black). The Schottky transistor is equipped with a very big base contact which has an additional edge (cyan). That is probably a hole in the base area through which the metal makes contact with the slightly n-doped collector. At this contact you get a Schottky diode.
In comparison with the rectangular output transistor (green) the triangle output transistor (red) is quite big. That´s because it´s a PNP and it works in linear mode with a higher power dissipation than the rectangle output that just switches on and off.
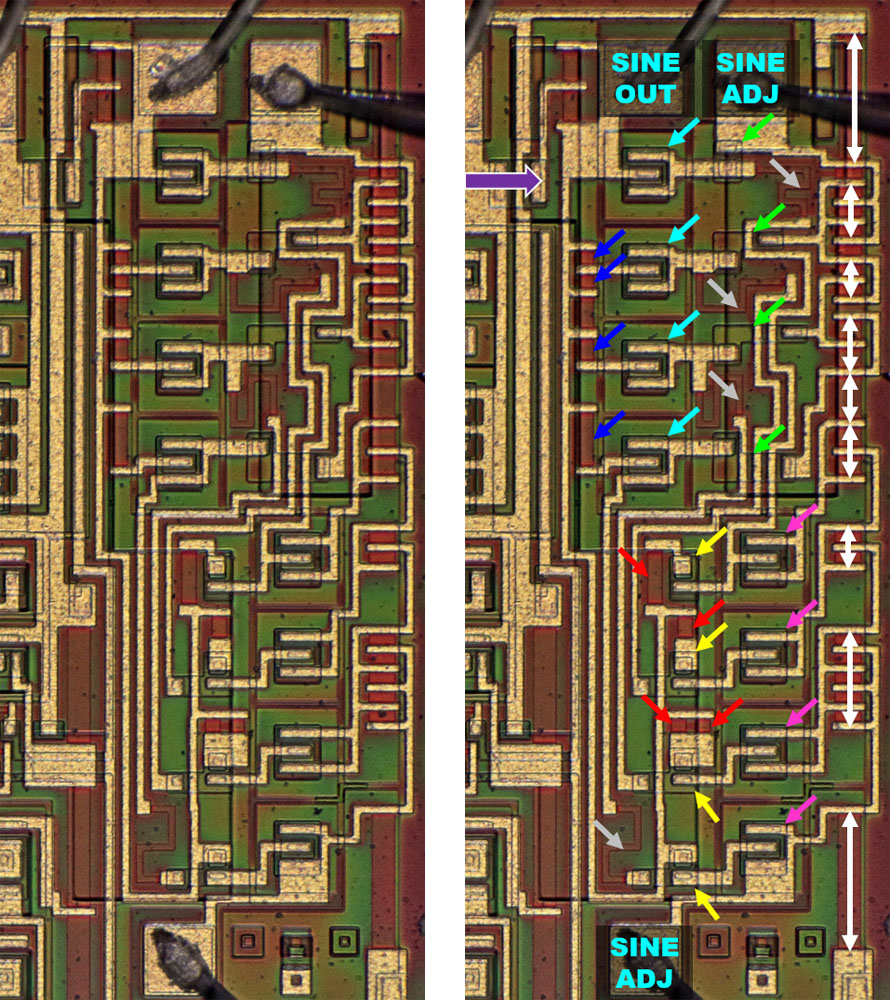
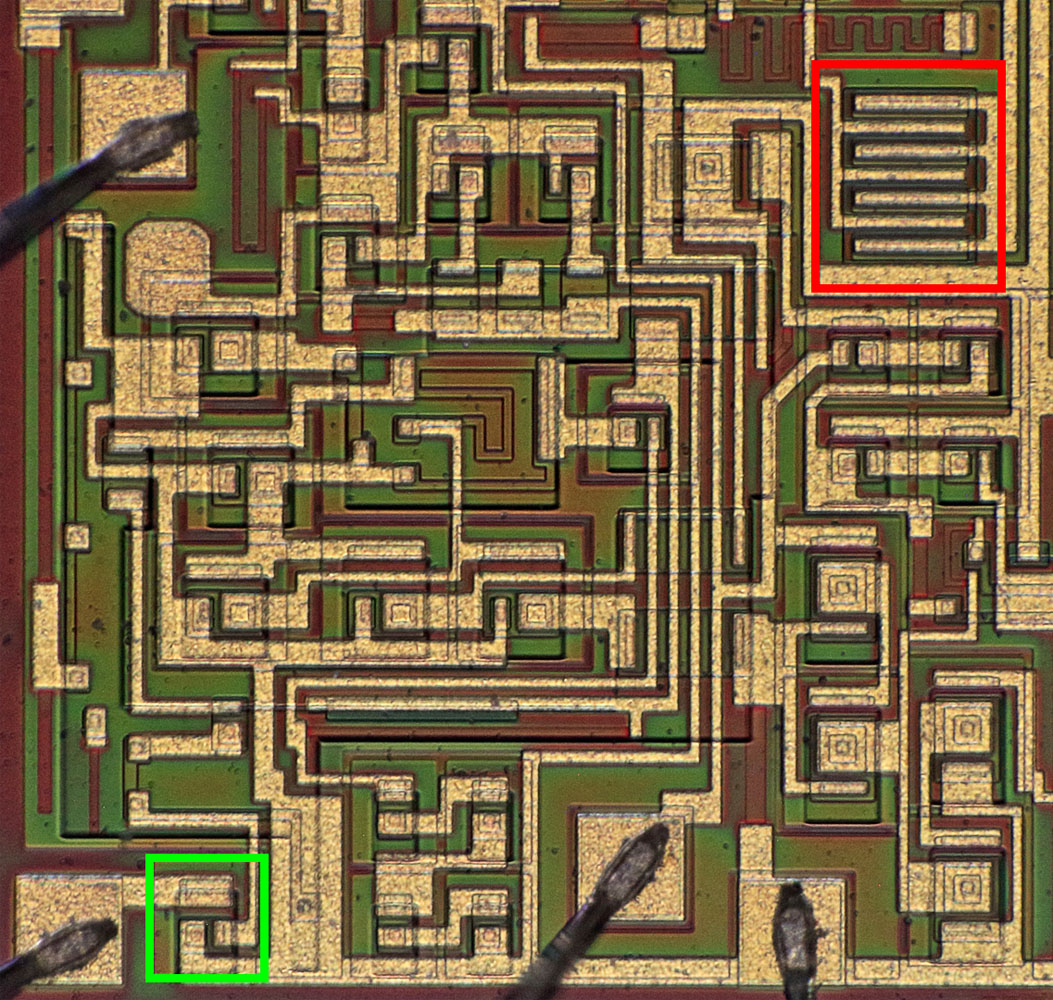
The sine shaper occupies a relatively large area on the right side of the die. In the upper half there are the PNP transistors, which represent the variable impedance to ground (cyan). To the left of them you can see the emitter resistors (blue). The different sizes are easy to recognize. For the lowest resistor value (800Ω), two elements were connected in parallel. Right of the load transistors there are the transistors that determine the voltage at which the stage kicks in (green). Some of the base areas had been extended to accomplish the wiring with just one metal layer.
In the lower area, the smaller NPN transistors (yellow) with their emitter resistors (red) are located on the left as a load. The less efficient and therefore larger PNP transistors, which determine the voltage the stage kicks in, are right of the load transistors (pink).
At the right edge of the die the resistors of the large voltage divider are integrated (white). To get the smaller values some of the areas are connected in parallel.
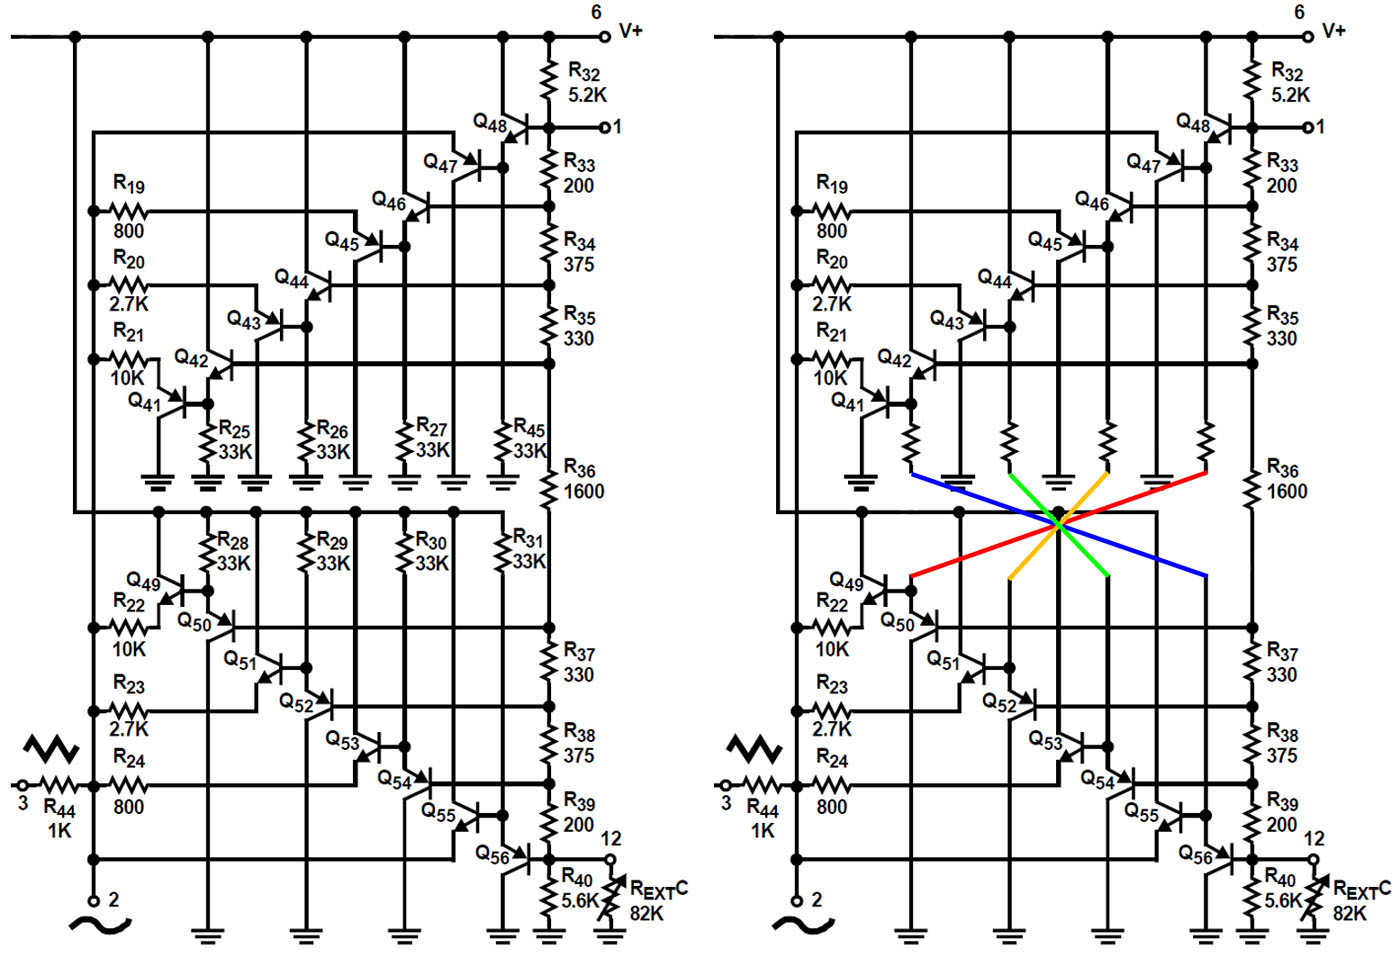
A closer look reveals that the transistors setting the onset voltage are not connected to the ground and supply potential as shown in the datasheet. Instead the opposite stages are cross-connected. This circuit consumes less area on the die. Perhaps it gives you a nicer sine wave too.
Would have to simulate the circuits...
https://www.richis-lab.de/gen02.htm 


