Resto-Rod PC: Old-School Big-Block CPU with modern GPUSo a couple months ago, I made a killer deal on a XXX Edition Radeon RX580; I was looking to upgrade my old (okay, VERY OLD) gamer rig just enough to be STEAM-compliant so I could play some FPV MultiCopter flight sims. My needs aren't that great; just a GPU that can consistently run STEAM games at 60FPS/1080P on my big-screen TV.
I figured even my venerable AMD 1055T should have enough HP for that, especially with a streamlined Win10 build on SSD. However, when I discovered my old mid-tower (I'd converted the beast to a daily driver a few years ago) was just too small for a modern GPU, I went shopping for a new mid-tower case... and things snowballed fast.

I decided after I'd gotten the V200 case that I wasn't willing to give up hardware temp monitoring or my hot-swap HDD bays, so I modded in an LED Thermometer and a Syba 2.5/3.5 in HDD bay. Then I started tidying up, and decided to sleeve up some of my cables... and soon
The Sleevening had begun...
-group-therapy-thread/?action=dlattach;attach=662286;image)


-group-therapy-thread/?action=dlattach;attach=662298;image)
-group-therapy-thread/?action=dlattach;attach=658059;image) https://youtu.be/dM5wugRVHUo
https://youtu.be/dM5wugRVHUoFirst up is a lighting highlight shot I posted last night for my buddies on the TEA thread, followed by my mouse & keyboard set blue to match. I've been running them green, but I was ready for a change anyways. Fortunately, my mouse & keyboard can change to match anything the fans can do... even this breathing effect, which due to PWM-controlled LED lighting interacting with the motion of the fan blades, does in fact turn quite hypnotic.
After that, some properly lit overviews with the covers on & off, then the front Top-Down, before moving on to the business end of the thing, showing enough ports for pretty much anything and a PCI Slot Syba 2.5 inch HDD Bay. I had to omit RS-232 for room to install the USB 3.0 Controller and the 4-port USB 2.0 header... not having a flupping USB hub dongle hanging off the back anymore was a more than fair trade, IMHO.
Here you can also see one of the well-thought-out features of the V200 case: the PSU cavity is dual-pattern; you can install the PSU upside down if you like. Which I did; while the case DOES have a bottom inlet air filter for modern PSUs, I found that the fixed-speed 140mm fan still makes a noticeable amount of noise. Flipping it upside down helps muffle it, and the labels are right side up. This PSU was made to feed a dozen GPUs for a mining rig; they run them upside-down.
Next is a shot through the radiator with the grill off, mostly just because
LED-ily.

And after that, a closeup of the front with the cover off so you can see the LED Thermometer and 2.5/3.5 inch trayless drive bays, followed by a nice peek under the hood with the mirrored glass side cover taken off. You can see the USB 3.0 controller with its sleeved cables to match, and the PWM-controlled rear fan I installed that is controlled along with the Cooler fans via the CPU FAN PWM control. The concept here is simple; under normal operation the front fans running at a fixed speed while cooler & rear fans just idle make the case mildly pressurized; this means that even if the CPU fans fail there is airflow through the radiator and as importantly, air picked up from the bottom of the case is minimized, reducing dust accumulation. When the CPU/Rear fans ramp up in response to heat, we get push/pull airflow up and out the back for redundant circulation.
That leads us into a closeup of the new RX580 video card that was the original reason for this case upgrade... I promise, I WILL return with some performance specs once I figure out how the big boys are benchmarking this sh...tuff nowadays.

You can see all the sleeved SATA cables, and the workings of the rear 2.5" drive bay, along with the 4-port USB header with cables sleeved to match.
Next, a nice closeup of the $60 (!!!) double-wide AIO liquid cooler off Amazon. So far, things are stabilizing right around 40°C during everyday usage with BIOS HW Monitor fan control set to "NORMAL", and it's fairly quiet. So, pretty good overall... though not as cool as the ~32°C it used to run with the old Thermaltake "Silent Copper" on there. Where the proof will be though, is in how it performs under heavy load.

After that, a reverse interior shot showing off all the LED fans, and that big-block iron 1055T along with 16GB of BALLISTIX DDR3 in fully synchronous mode (hey, that was a big deal when I rebuilt this iteration like... 8 years ago) and our the tour of the front side of the case is complete.
But wait!!! This beast is nice & tidy in the back as well... sleevening reigns supreme in this scenario as this is a working PC, so not suitable to the minimalist builds that make such a clean look with more modern gaming rigs.
Next is a closeup of the LED lighting controller and its associated wiring, followed by a closeup of the 2.5/3.5 inch HDD bay area, showing the 3D printed mounting bracket and the front of the
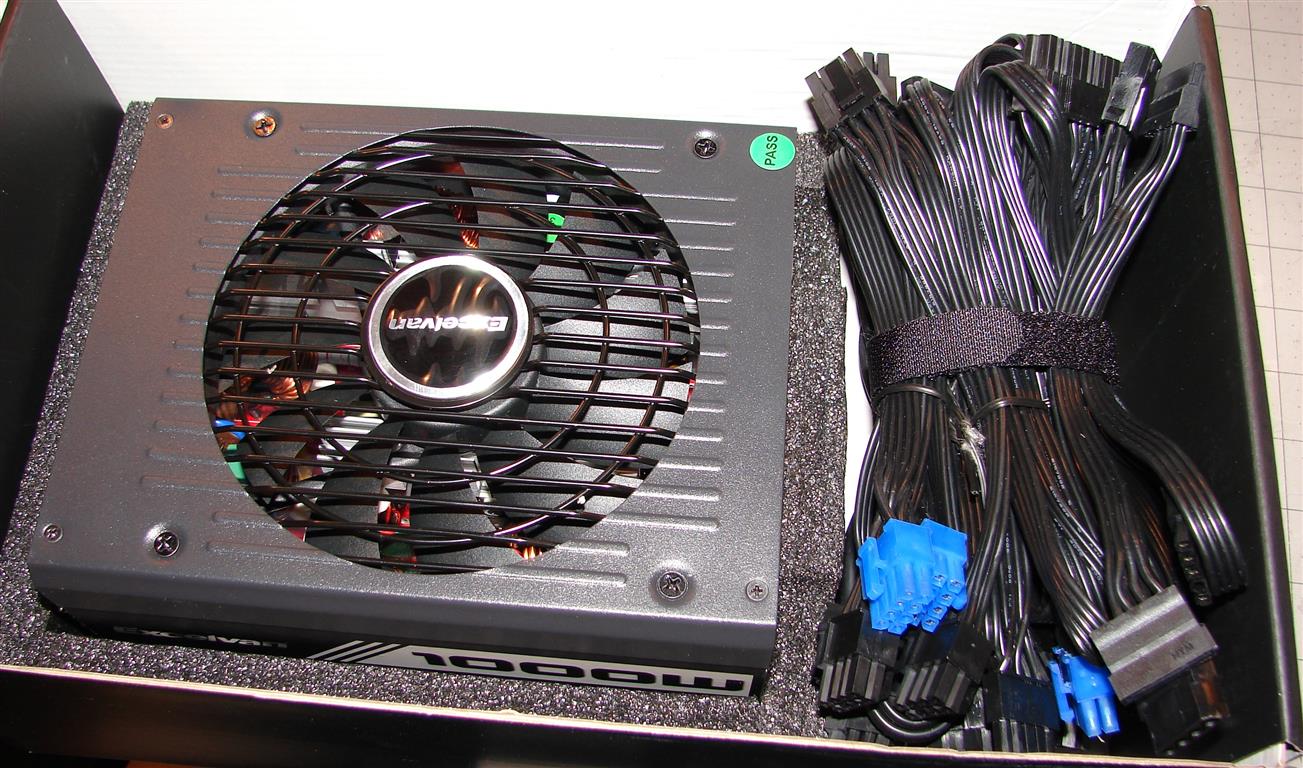
fully modular 1KW (for reallzz!!!) power supply. Just imagine what a mess this would be with a half-dozen unused power supply cables stashed in there as well.

All this neat comes at a cost... $$ for sleeving and heat-shrink, and time... lots of it... making custom cables like this one so they can be routed where I want them, not just where they'll reach. The end results are well worth it, however... even if yo do have one "little gawddammitt" bit of gear that DOESN'T have all locking cables, so you HAVE to safety wire it and ruin the aesthetic in one little corner of the project.

Ahhh well... the great artisans of old used to deliberately flaw their work in some way, for to display such hubris as to attempt perfection was an affront to the gods. Guess I'm saved from their wrath one more time.
Of course, as with any great undertaking there were some casualties... too many late nights, too many expletives, and my poor Thermogrip gun was abused mightily. So badly that it does appear it may have developed a runny nose. Maybe a little rest in the drawer will sort it out, now the job is done. I'm ready to try that myself, I think...
For those who wonder where I got all my parts, I'll tell the truth... I was pretty much Amazon's bit** on this project. Every time I went looking for something, they either had it cheaper and quicker than anyone else (especially fleaBay) or they had something a LOT better for a few dollars more.
That's how I wound up with this gorgeous V200 for $65 case instead of a cheap Rosewill mid-tower, and how I wound up with a double-wide All-in-One liquid cooler for $60 when I was just looking for a couple PWM-controlled RGB 120mm fans, and a 1KW Cryptomining PSU for $32 when I was just looking for a few extension cables. I added the Syba 2.5/3.5" HDD Bay with some Dremel abuse and a little help from my 3DPrinter, and the cheap LED Thermometer's sensor is set up with a little thermal grease so it makes direct contact with the CPU.
Thermaltake V200 caseExcelvan 1KW Cryptomining PSUupHere All In One 120mm x 240mm CPU CoolerSyba 2.5/3.5" HDD BaySyba PCI Slot 2.5" HDD BayCheap LED Thermometer1/2" Sleeving3/4" Sleeving20 Feet Asst Heat-Shrinkmnem
*Toddling off to ded*


